Setting up a K3S Cluster on Proxmox with Cloud-init & HAProxy

Hello everyone and welcome to a new project series revolving around the setup of a K3s Kubernetes cluster using Proxmox, GitOps, Flux, and Azure Arc to create cluster architecture, automate provisioning of cluster nodes, deploy and manage apps declaratively, and use Azure for RBAC allowing governance over the cluster. Below I have detailed the goals for this project as well as the hardware that we will be using.
Goals
- Stand up reliable K3S 6-node HA cluster on Proxmox Home Lab.
- Make use of cloud-init for node provisioning, learning about cloud-init in the process.
- Configure HAProxy and KeepAlived on 2 VMs for load balancing.
- Connect cluster up to Azure Arc providing Governance and Remote Access.
Hardware Constraints
- 5 Proxmox Nodes varying in CPU Power.
- 16-32GB of RAM per node.
- 1TB of Storage on each node.
- All nodes reside on same network segment.
- Cloud-init available for OS bootstrap and provision.
Topology Diagram

Proxmox Node Provision via cloud-init
Before we get started on the creation of our cloud-init configuration, we first need to download a cloud image template to our Proxmox nodes. I will be using two nodes in total out of the 5 that I have in my personal home lab, but I will be running 5 VMs in total on these nodes.
- 2x HAProxy/Keepalived VMs
- 3x Control Plane K3s nodes (VMs)
- 3x K3s Worker Nodes (VMs)
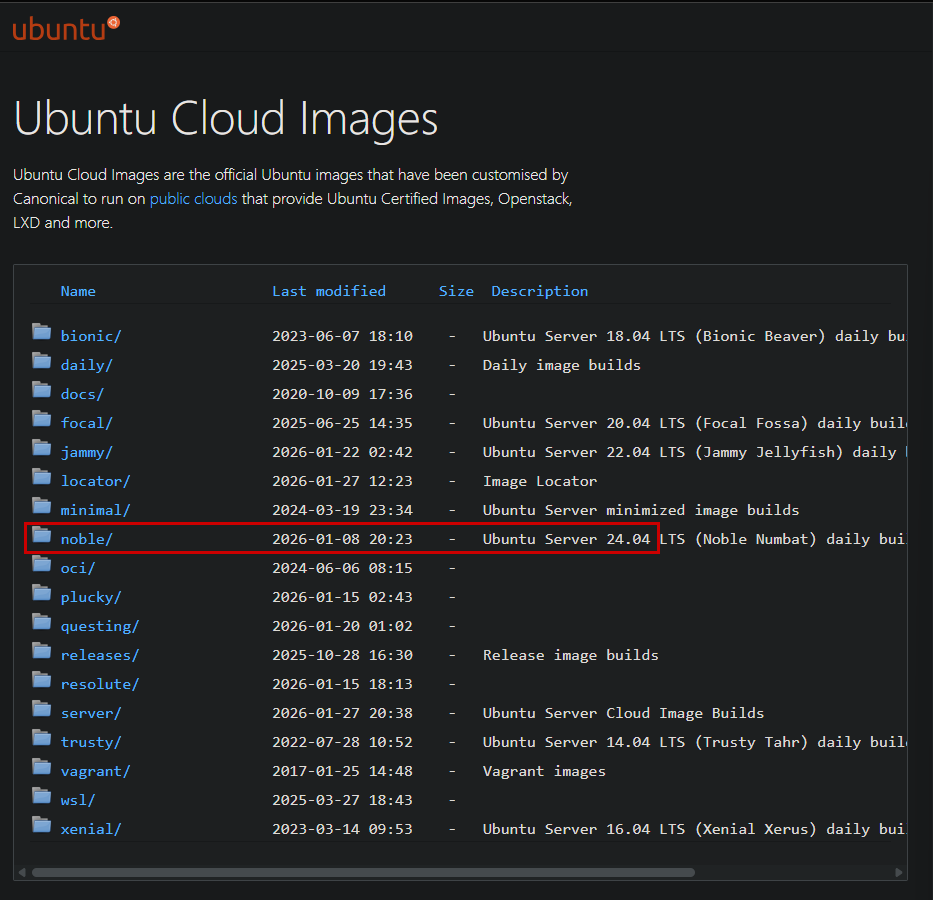
For maximum compatibility with Kubernetes, and K3s specifically, I will be using an Ubuntu server cloud image. Take a look at https://cloud-images.ubuntu.com/ and see what the latest cloud image is. At the time of writing, the latest version of the Ubuntu server cloud image available is 24.04 LTS.
![]()
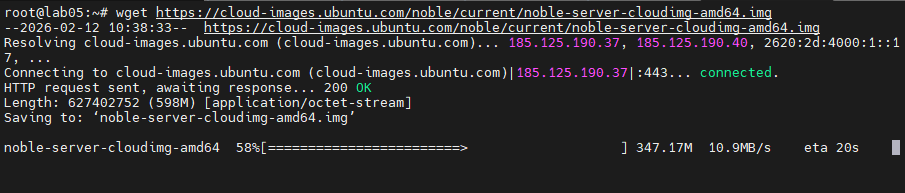
I ran wget to download the image directly to each of the nodes:
wget https://cloud-images.ubuntu.com/noble/current/noble-server-cloudimg-amd64.img


VM Templating via QM
With our image downloaded to our nodes, we can now start to create a baseline template to work off of. The goal is to have a general-use template that has the VM specs set in stone and our cloud image applied to it.
From there we can apply user account settings, SSH, auto-install apps, run scripts, etc., via Proxmox's cloud-init and snippets functionality.
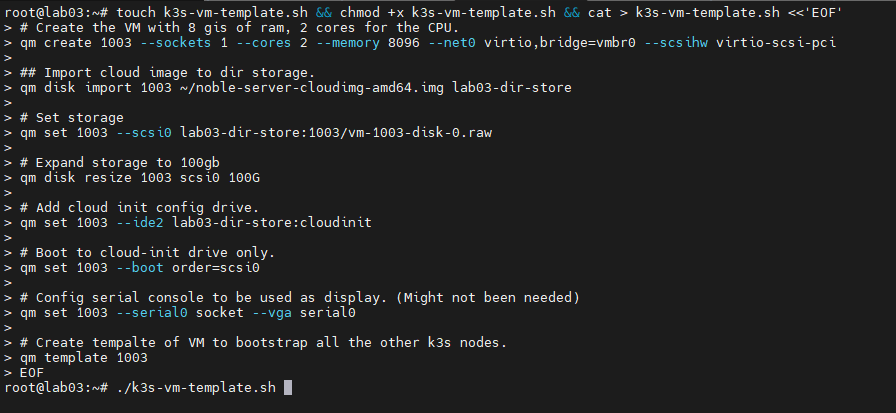
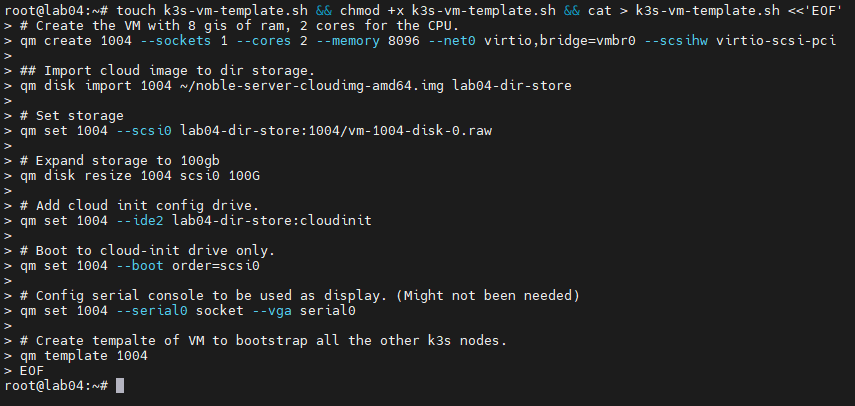
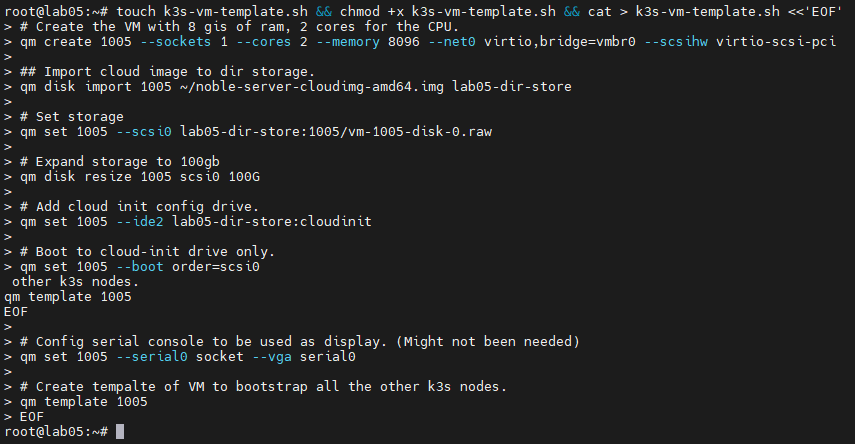
Below is what I came up with after checking the Proxmox documentation for the qm command. The qm command can handle all of the same functionality as the GUI in terms of VM setup.
# Create the VM with 8GB of RAM, 2 cores for the CPU.
qm create 1001 --sockets 1 --cores 2 --memory 8096 --net0 virtio,bridge=vmbr0 --scsihw virtio-scsi-pci
## Import cloud image to dir storage.
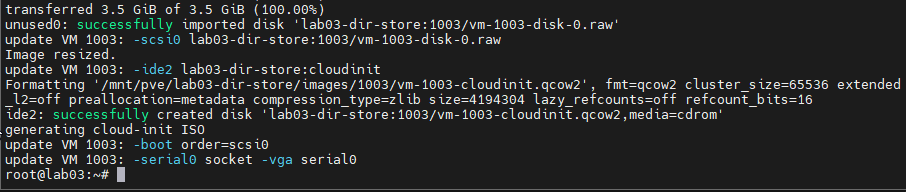
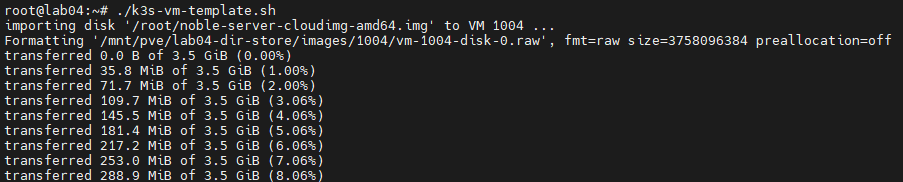
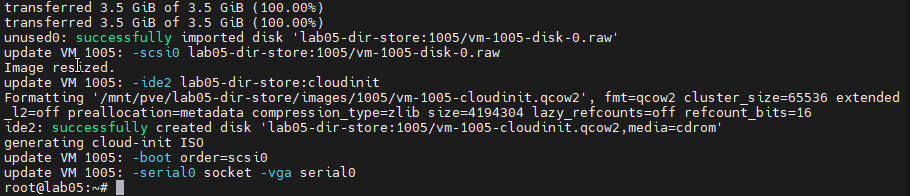
qm disk import 1001 ~/noble-server-cloudimg-amd64.img lab05-dir-store
# Set storage
qm set 1001 --scsi0 lab05-dir-store:1001/vm-1001-disk-0.raw
# Expand storage to 100GB
qm disk resize 1001 scsi0 100G
# Add cloud-init config drive.
qm set 1001 --ide2 lab05-dir-store:cloudinit
# Boot to cloud-init drive only.
qm set 1001 --boot order=scsi0
# Config serial console to be used as display. (Might not be needed)
qm set 1001 --serial0 socket --vga serial0
# Create template of VM to bootstrap all the other k3s nodes.
qm template 1001
As you can see in the above, we set all of the hardware specs for the VM, defining the cores, RAM, storage space, attaching the image, resizing the storage as it defaults to the size of the image attached, set the boot order, configure the serial/VGA settings, and finally wrap it all into a template that can be reused.
Note: the storage paths will change from node to node and also due to whatever storage method has been setup on the node. Also the template number should be changed accordingly as well.
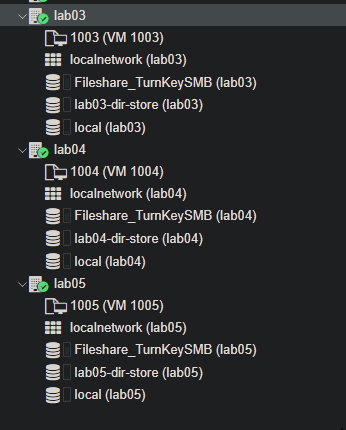
Creating script file and running on Proxmox Node Lab03:

Creating script file and running on Proxmox Node Lab04:
Creating script file and running on Proxmox Node Lab05:

And now we have our VM templates setup and ready to deploy our k3s setup.
Automating K3s Install via Cloud-init & Proxmox Snippets
With our templates setup and defined, we can now transition over to the setup of our cloud-init configurations. Cloud-init is a standard, originally created by Canonical, that is a method of customizing OS cloud images/instances. It has a runcmd directive, which runs whatever commands you define the first time the VM boots. We will make use of this and some of the other customization options to make the setup of our Proxmox K3s Nodes/VMs partially automated.
I will be creating individual YAML files in the snippets directory on our Proxmox hosts. The default path is /var/lib/vz/snippets, but in my case, I will be moving the snippets to the directory storage on each node, which is also where our VM/QCOW2 files are located. Creating all of the snippets on a single node to conserve time, I will copy them over to all nodes involved in the project via SCP.
Here are all of the created YAML files on my lab03 Proxmox machine.

Below is what I came up with as a baseline YAML file to be modified for each component of the K3s cluster.
#cloud-config
hostname: <host_name>
manage_etc_hosts: true

users:
  - default
  - name: dario
    gecos: Admin User
    groups: [sudo]
    shell: /bin/bash
    sudo: ALL=(ALL) NOPASSWD:ALL
    lock_passwd: true
    ssh_authorized_keys:
      - ssh-ed25519 <your_ssh_key>
ssh_pwauth: false
package_update: true
package_upgrade: true

packages:
  - qemu-guest-agent
  - spice-vdagent

runcmd:
  - [systemctl, enable, --now, qemu-guest-agent]
In this baseline, I included some configurations such as:
- Adding a custom Admin account.
- Granting it sudo access.
- Disabling password auth for security.
- Including my SSH key for passwordless access.
- Forcing package updates once the VM is up.
- Installing the QEMU agent and spice agent for enhanced VM/Proxmox functionality.
- Adding the
runcmdcommand to pass custom commands to the VM for first-boot execution, including the command to enable theqemu-guest-agent.
Note that in my cloud-config YAML file I left the placeholder <your_ssh_key>. If you are using this in your own project or Proxmox setup, please edit accordingly.
Control Plane cloud-init YAML:
#cloud-config
hostname: cp1
manage_etc_hosts: true

write_files:
  - path: /etc/rancher/k3s/config.yaml
    permissions: "0600"
    token: "dario-k3s-cluster"
    cluster-init: true
    tls-san:
      - "10.1.3.1" # HA VIP/LB addr
users:
  - default
  - name: dario
    gecos: Admin User
    groups: [sudo]
    shell: /bin/bash
    sudo: ALL=(ALL) NOPASSWD:ALL
    lock_passwd: true
    ssh_authorized_keys:
      - ssh-ed25519 <your_ssh_key>
ssh_pwauth: false
package_update: true
package_upgrade: true

packages:
  - qemu-guest-agent
  - spice-vdagent

runcmd:
  - [sh, -c, "curl -sfL https://get.k3s.io | sh -s - server"]
In the above snippet, take a look at the write_files section. This is a pretty nice bit of functionality that allows us to write content to files on the target VM on first boot, similar to runcmd but specifically for the modification of files and setting file permissions. Here I am making use of it to modify the configuration for K3s, setting the permissions of the config file, providing the cluster token, initializing the cluster, and setting the load balancer VIP for the control nodes.
#cloud-config
hostname: cp2
manage_etc_hosts: true

write_files:
  - path: /etc/rancher/k3s/config.yaml
    permissions: "0600"
    token: "dario-k3s-cluster"
    server: "https://10.1.3.1:6443" # HA VIP/LB control plane
    tls-san:
      - "10.1.3.1"
users:
  - default
  - name: dario
    gecos: Admin User
    groups: [sudo]
    shell: /bin/bash
    sudo: ALL=(ALL) NOPASSWD:ALL
    lock_passwd: true
    ssh_authorized_keys:
      - ssh-ed25519 <your_ssh_key>
ssh_pwauth: false
package_update: true
package_upgrade: true

packages:
  - qemu-guest-agent
  - spice-vdagent

runcmd:
  - [sh, -c, "curl -sfL https://get.k3s.io | sh -s - server"]
Did the same for the additional control nodes, adding content to the K3s config.yaml file, which will allow us to auto-join the control plane nodes to the cluster and point the control plane to our load balancer.
Next we will create a specific YAML file for our worker nodes. The YAML file also uses write_files and runcmd to auto-join the worker node to the K3s cluster, passing the VIP for the cluster's load balancer and the token needed to join the cluster.
Worker Plane cloud-init YAML:
#cloud-config
hostname: w1
manage_etc_hosts: true

users:
  - default
  - name: dario
    gecos: Admin User
    groups: [sudo]
    shell: /bin/bash
    sudo: ALL=(ALL) NOPASSWD:ALL
    lock_passwd: true
    ssh_authorized_keys:
      - ssh-ed25519 <your_ssh_key>
ssh_pwauth: false
package_update: true
package_upgrade: true

packages:
  - qemu-guest-agent
  - spice-vdagent

write_files:
  - path: /etc/rancher/k3s/config.yaml
    owner: root:root
    permissions: "0600"
    content: |
      server: "https://10.1.3.1:6443"
      token: "dario-k3s-cluster"

runcmd:
  - [systemctl, enable, --now, qemu-guest-agent]
  - [sh, -c, "curl -sfL https://get.k3s.io | INSTALL_K3S_EXEC='agent' sh -s -"]
Lastly, below is the YAML file for the configuration of the load balancers for the cluster, two in total; these VMs will be spun up first and the control plane K3s nodes will interface with them.
Load Balancer cloud-init YAML:
#cloud-config
hostname: lb1
manage_etc_hosts: true

users:
  - default
  - name: dario
    gecos: Admin User
    groups: [sudo]
    shell: /bin/bash
    sudo: ALL=(ALL) NOPASSWD:ALL
    lock_passwd: true
    ssh_authorized_keys:
      - ssh-ed25519 <your_ssh_key>
ssh_pwauth: false
package_update: true
package_upgrade: true

packages:
  - qemu-guest-agent
  - spice-vdagent
  - haproxy
  - keepalived

write_files:
  - path: /etc/haproxy/haproxy.cfg
    owner: root:root
    permissions: "0644"
    content: |
      frontend k3s-frontend
        bind *:6443
        mode tcp
        option tcplog
        default_backend k3s-backend
      backend k3s-backend
        mode tcp
        option tcp-check
        balance roundrobin
        default-server inter 10s downinter 5s
        server cp1 10.1.3.21:6443 check
        server cp2 10.1.3.22:6443 check
        server cp3 10.1.3.23:6443 check
  - path: /etc/keepalived/keepalived.conf
    owner: root:root
    permissions: "0644"
    content: |
      global_defs {
        enable_script_security
        script_user root
      }
      vrrp_script chk_haproxy {
        script 'killall -0 haproxy'
        interval 2
      }
      vrrp_instance haproxy-vip {
        interface eth0
        state MASTER # MASTER on lb-1, BACKUP on lb-2
        priority 200 # 200 on lb-1, 100 on lb-2

        virtual_router_id 51

        virtual_ipaddress {
          10.1.3.1/16
        }

        track_script {
          chk_haproxy
        }
      }
runcmd:
  - [systemctl, enable, --now, qemu-guest-agent]
  - [systemctl, enable, --now, haproxy]
  - [systemctl, enable, --now, keepalived]
Take a look at the configurations for HAProxy and Keepalived. lb1 will be set as the main load balancer, while lb2 will be the backup. They will work in tandem routing service in a round-robin format.
After the creation of the YAML files on my computer and linting them via a VSCode plugin to ensure that the syntax and formatting are correct, I proceeded to use SCP to copy the files to all of the Proxmox nodes used for this lab.

Spin up of VM nodes for K3s implementation
It's now time to spin up our VMs and create our cluster.
Since we have preconfigured all of our VM nodes and load balancers using cloud-init and Proxmox's VM templating, we should be able to spin up all of our virtual machines and have minimal configuration to do.
I will first be bringing the load balancers online and confirming that all configuration has taken hold from our cloud-init YAML files, validating that everything is working. Then the control nodes, connecting back to the virtual IP of the load balancer, and after that, we will join all 3 worker nodes, completing the cluster.
Load Balancers
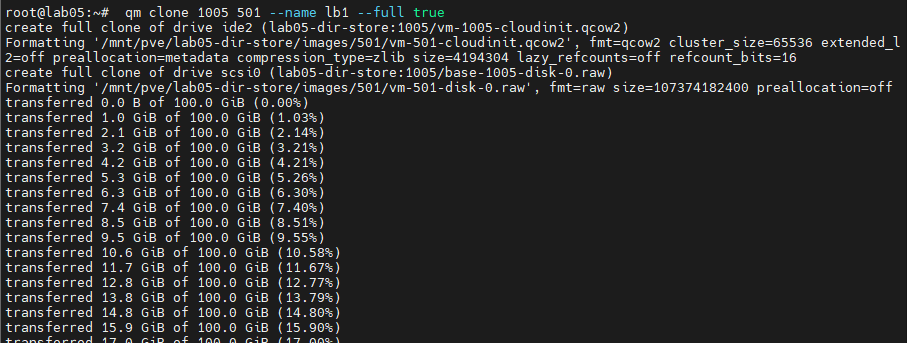
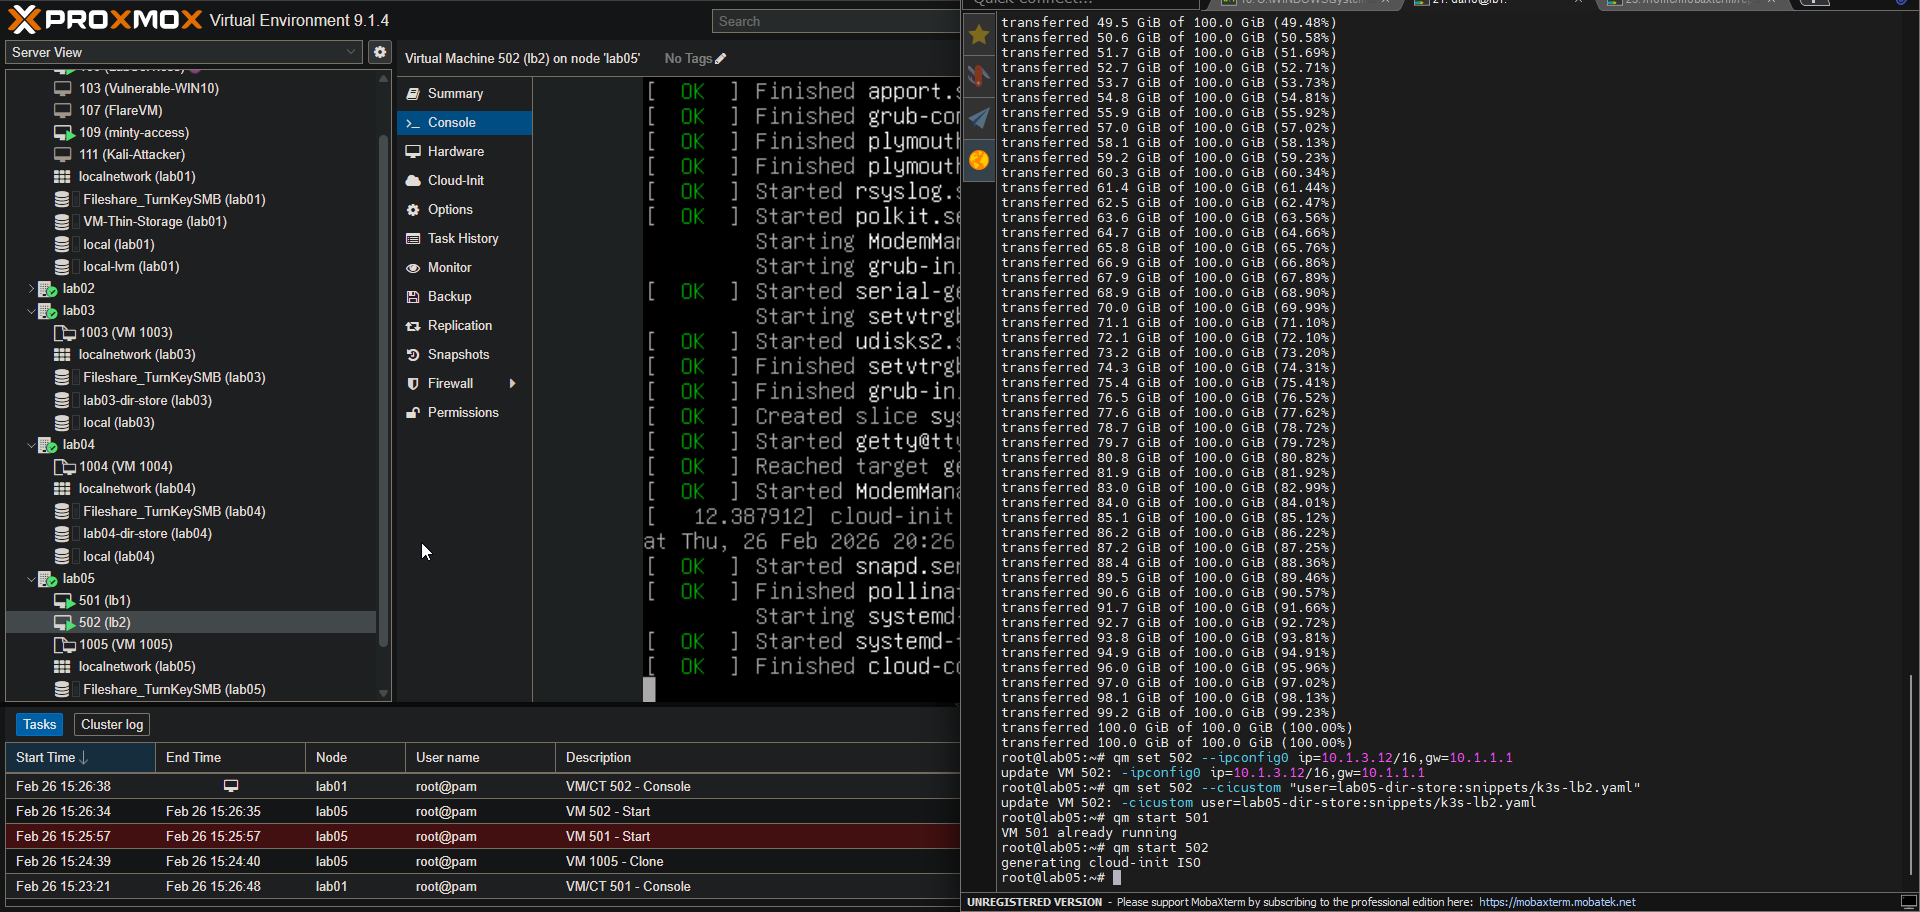
I will be creating the load balancer nodes on the lab05 Proxmox node in my home lab. The first item is to clone the VM template.
VM Template clone command, naming the VM and forcing a true clone of the template.
qm clone 1005 501 --name lb1 --full true
Then we need to set the IP address and default gateway for our load balancer VM. Referring to the network topology at the top of this project post, our lb1 VM should be configured with 10.1.3.11 and the default gateway for the home lab network is 10.1.1.1. I have included the command below to set that.
qm set 501 --ipconfig0 ip=10.1.3.11/16,gw=10.1.1.1

Now we attach our corresponding k3s-lb1.yaml file that we transferred to the Proxmox node via SCP.
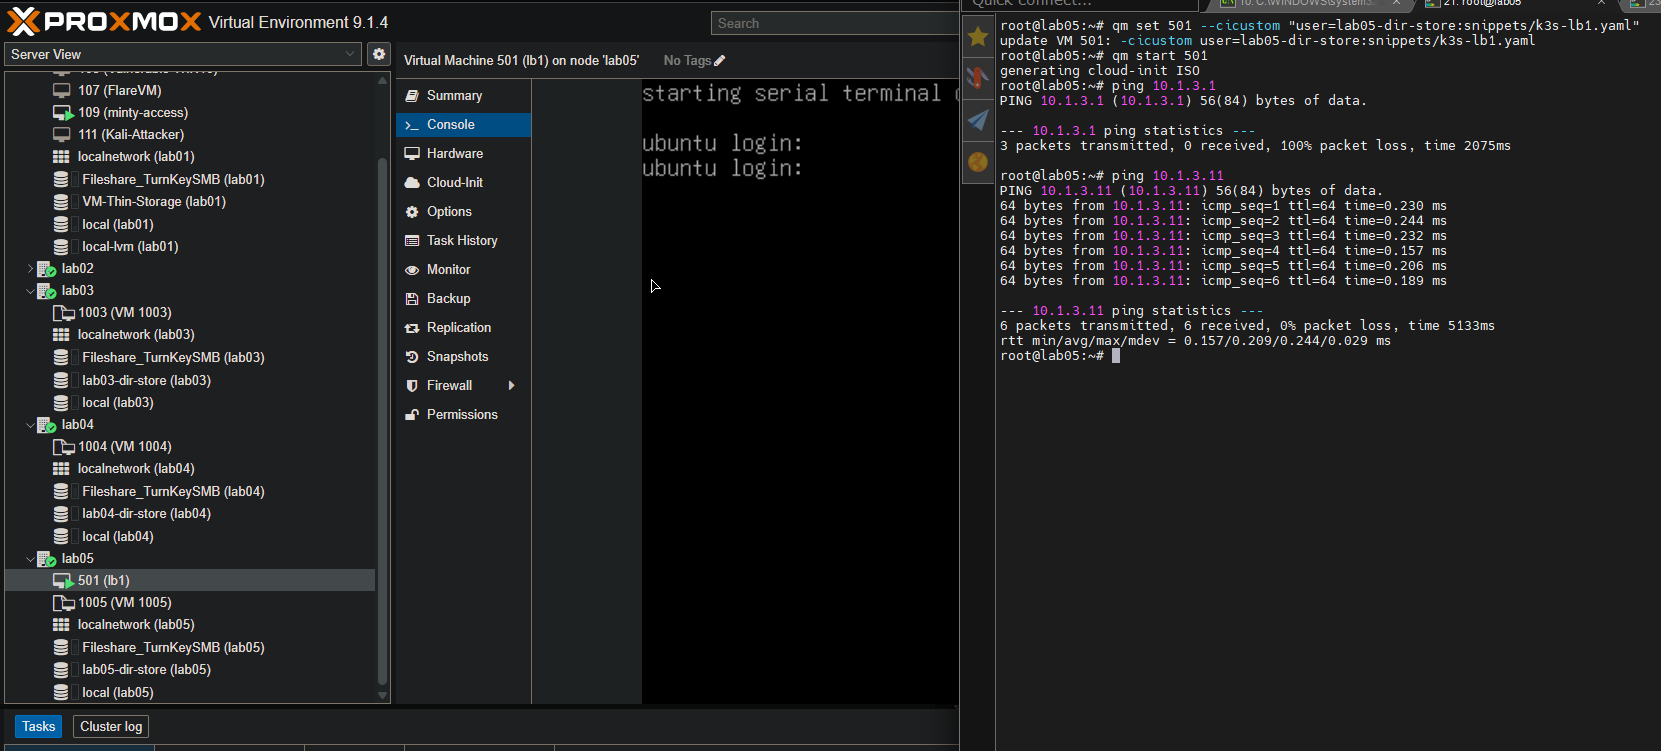
qm set 501 --cicustom "user=lab05-dir-store:snippets/k3s-lb1.yaml"

With all that set, the time has come to start up the VM so we can validate the configuration.
qm start 501

I checked the IP address real quick via pinging from the Proxmox node and had no issues. Also checked that the VM was up and running from the GUI.
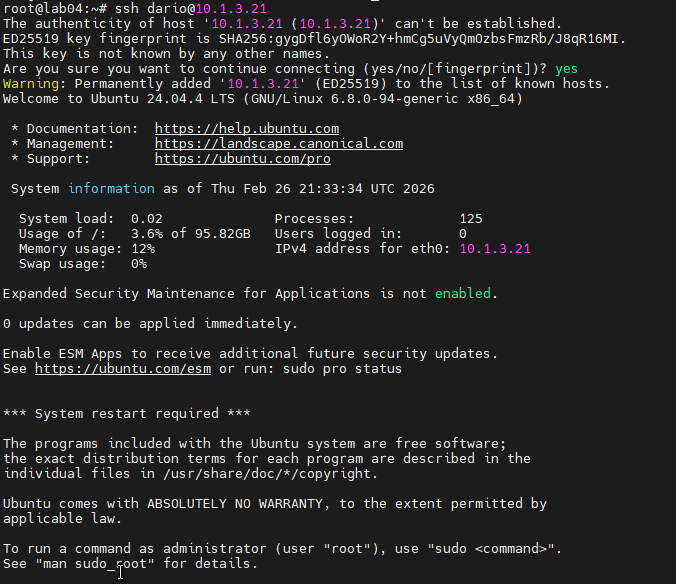
I've generated an SSH key pair on my Proxmox host lab05, so we should be able to login without password auth, as we placed the public key in the cloud-init YAML file for each K3s node and disabled the password auth setting for enhanced security.
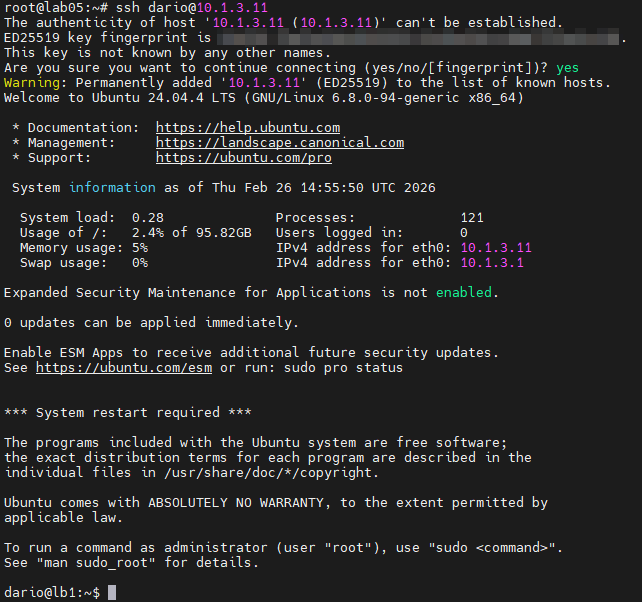
I validated that the public SSH key was passed in the cloud-init YAML file and successfully imported via testing SSH from the Proxmox host to the lb1 VM. In the image above you see that I was able to gain remote access without a password.
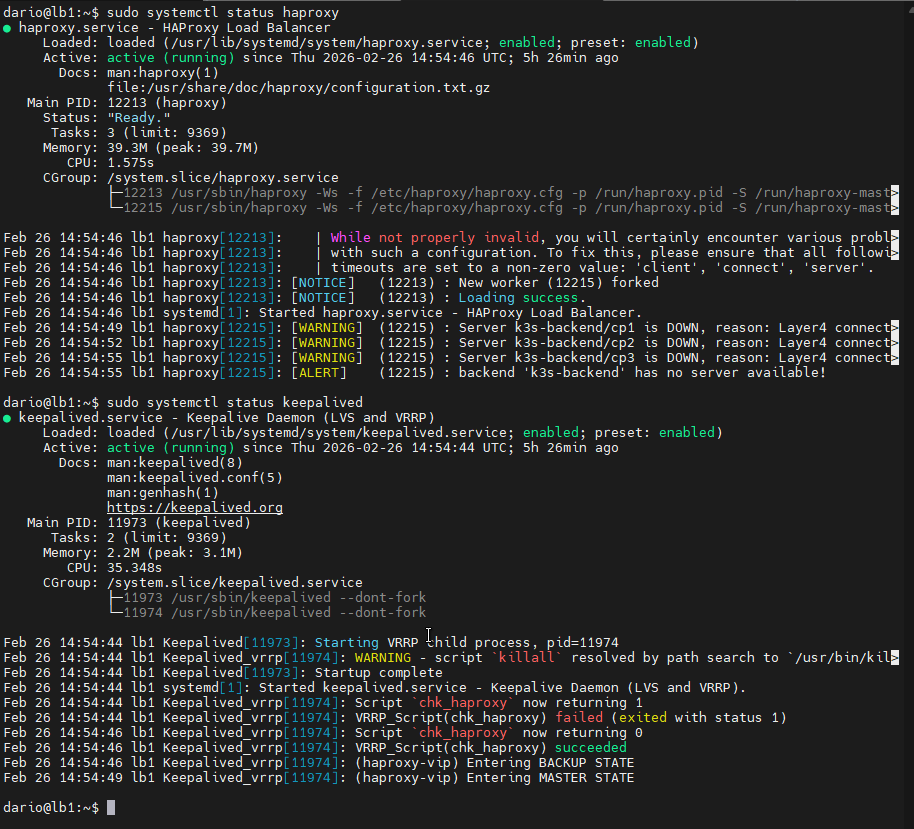
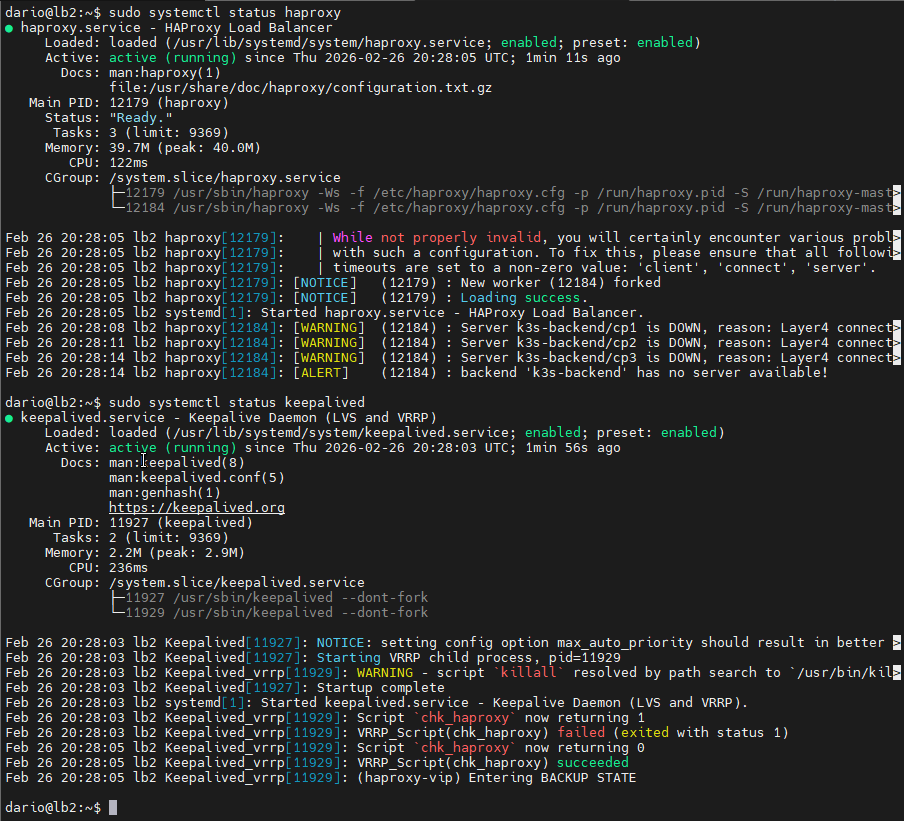
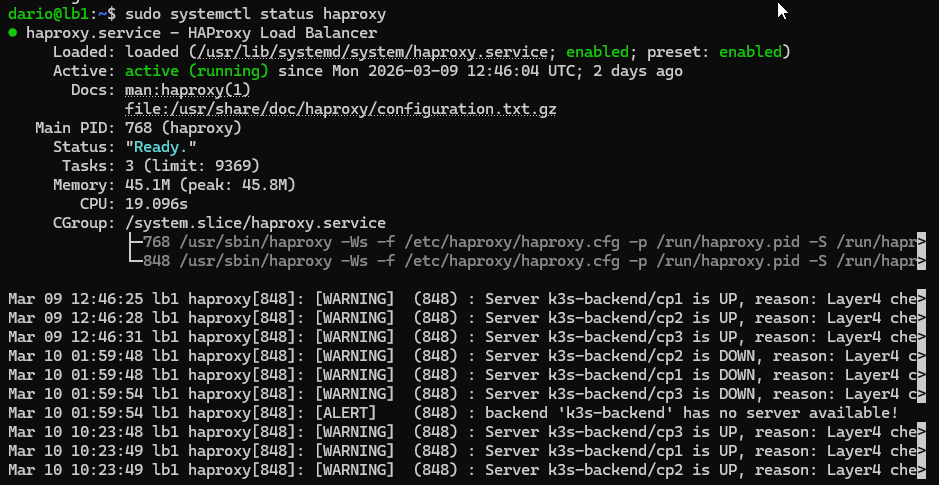
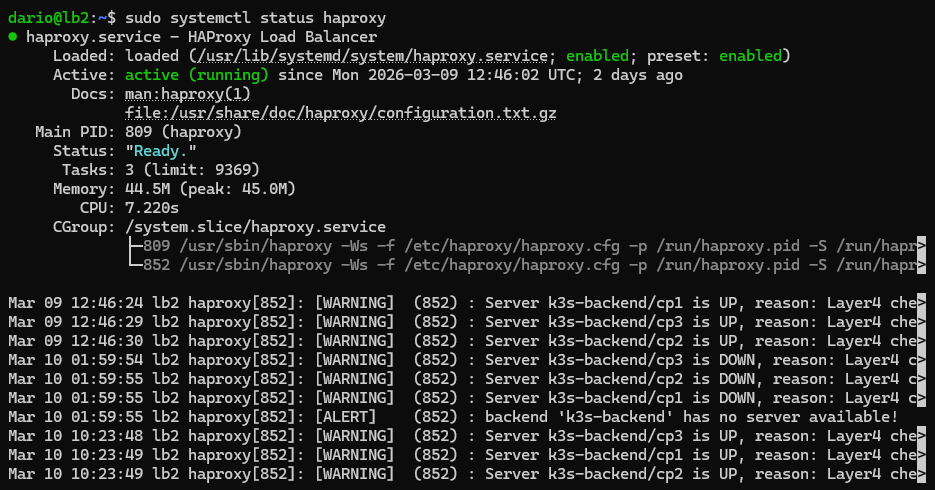
Next, I validated that both HAProxy and Keepalived were both running on the system. As you can see in the image above, both services are running, though they are throwing some errors as the rest of our infrastructure hasn't been spun up yet.
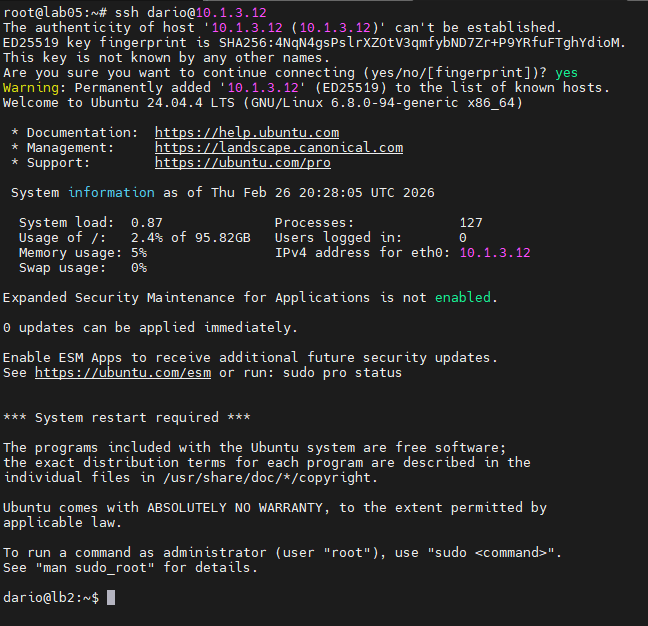
I then did the same steps for the lb2 VM.
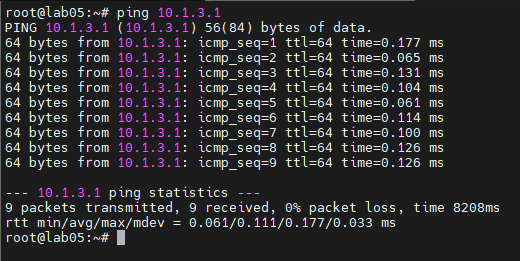
I then ran a ping test for the load balancer virtual IP address to confirm that it is reachable and our load balancer VMs are handling the incoming traffic.
Control Plane Nodes
With our load balancers up and running correctly, we can now bring up our 3 control nodes, effectively initializing the cluster and joining the additional control nodes into the fold.
My control nodes will reside on my lab04 Proxmox host.
The steps will be the same as for the load balancer VMs, as we have preconfigured everything via cloud-init.

Here I am logged in via SSH and authenticated via SSH key.
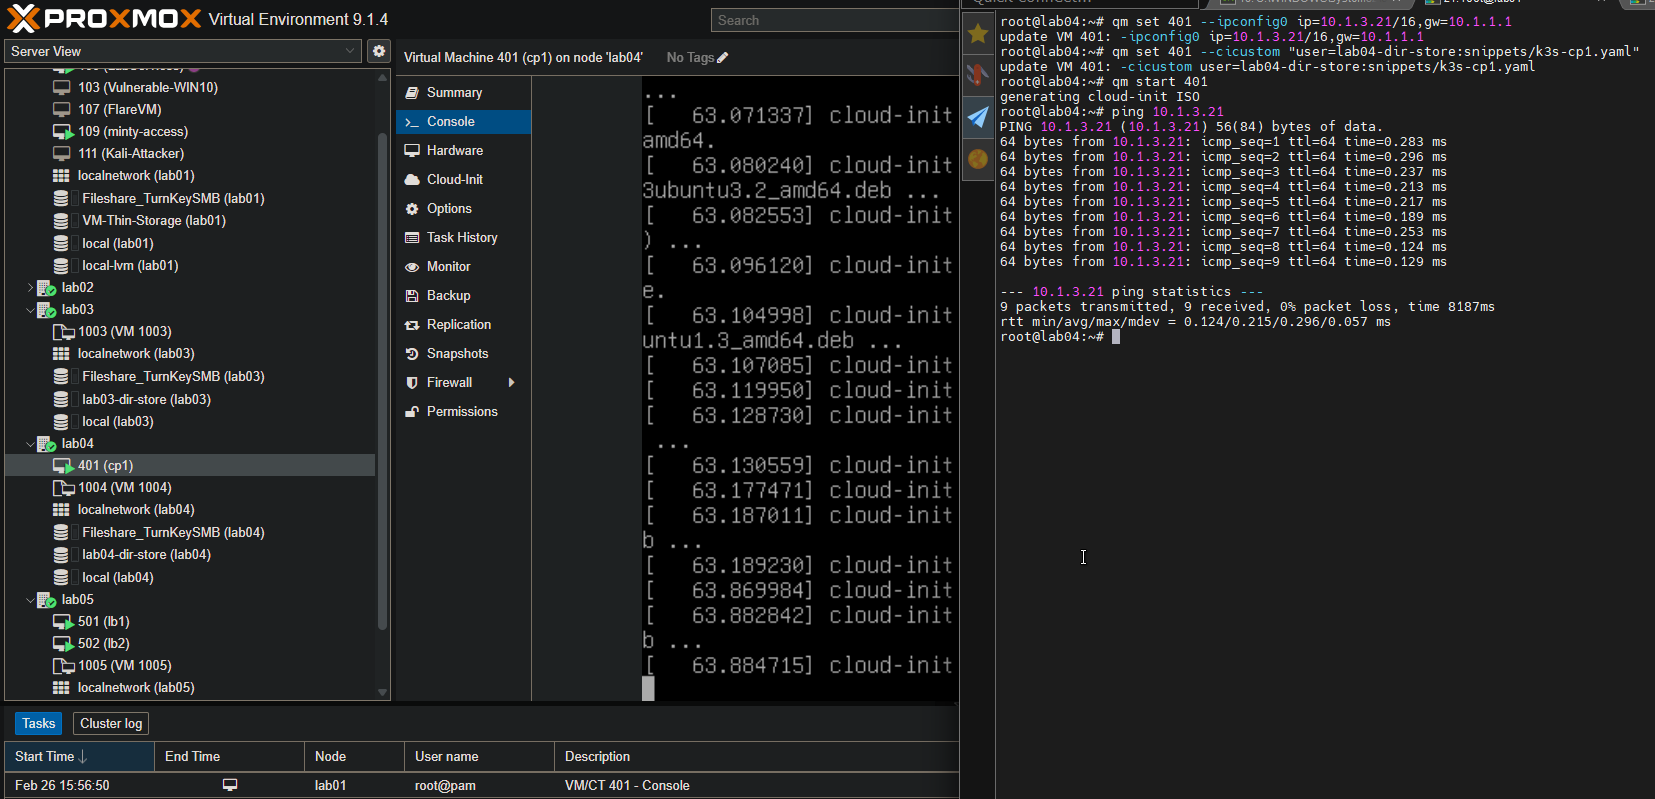
Here is the validation of K3s running on the cp1 VM.

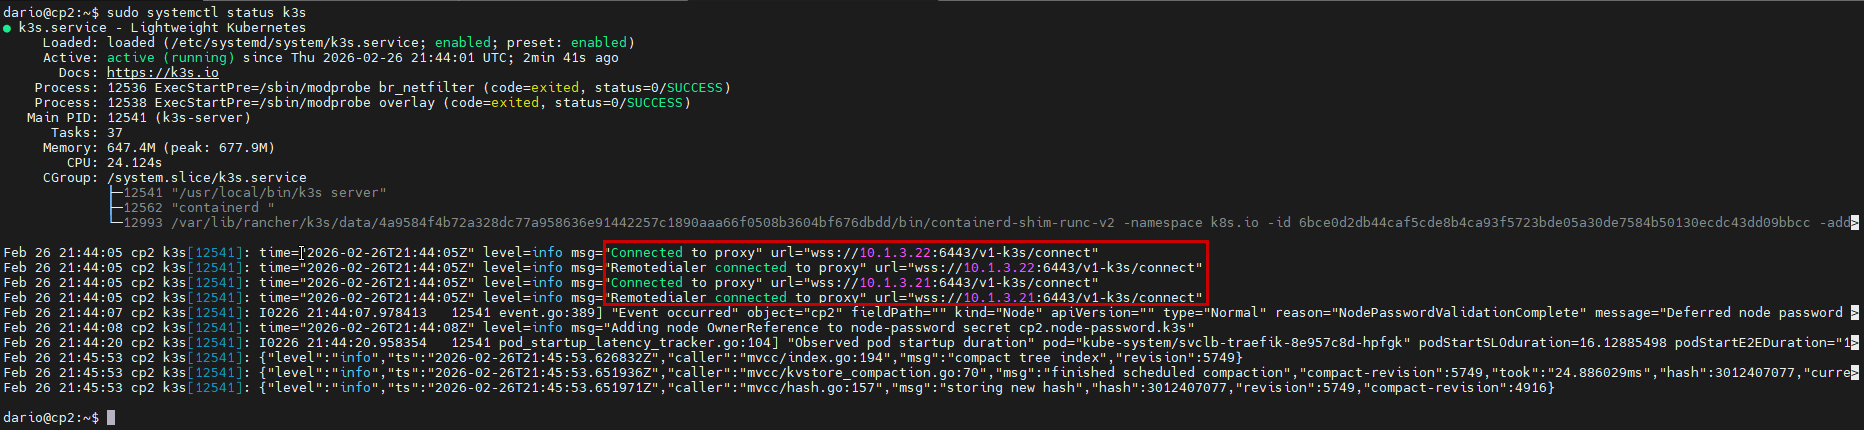
In this image of the validation from cp2, you can see that the VM has joined the K3s cluster and is connected to cp1 @ 10.1.3.21.
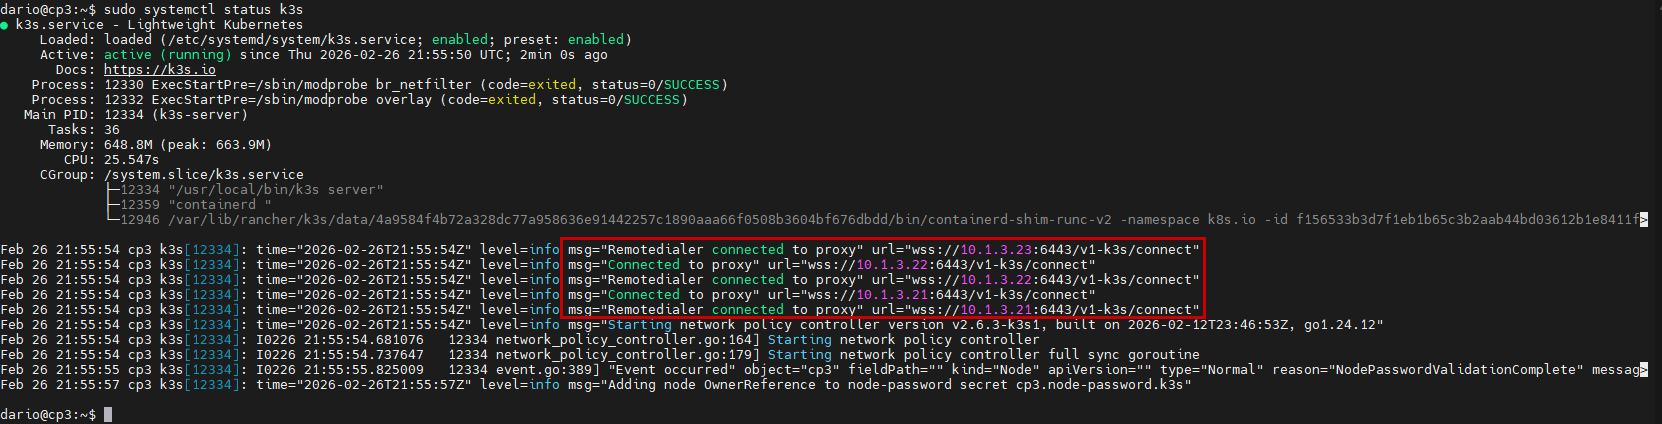
And finally, we have our last K3s control node up and running. Logs from systemctl inform us that the K3s node is connected to all the other control plane nodes.
Worker Nodes
The last set of nodes to bring up now are our worker nodes, the workhorses of the cluster.
All the worker nodes will reside on my lab03 Proxmox machine.
The workflow is identical to the previous nodes in the cluster, but there is an additional step for joining the workers to the cluster. This needs to be done on the master control node.
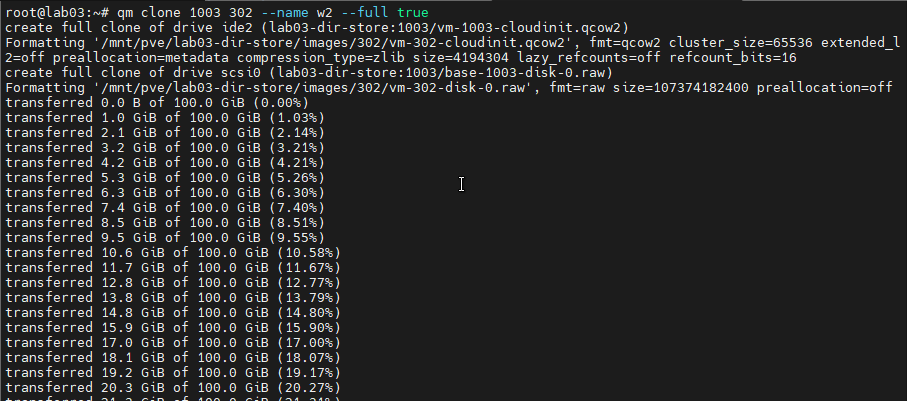
- Clone the VM from the already created template.
- Attach the corresponding cloud-init snippet to the cloned VM.
- Set the network configuration settings (IP Address & Default Gateway).
- Power up the VM and verify the configuration.
- Important Step: Run the below commands to join the workers to the cluster:
sudo kubectl label node w1 node-role.kubernetes.io/worker=truesudo kubectl label node w2 node-role.kubernetes.io/worker=truesudo kubectl label node w3 node-role.kubernetes.io/worker=true
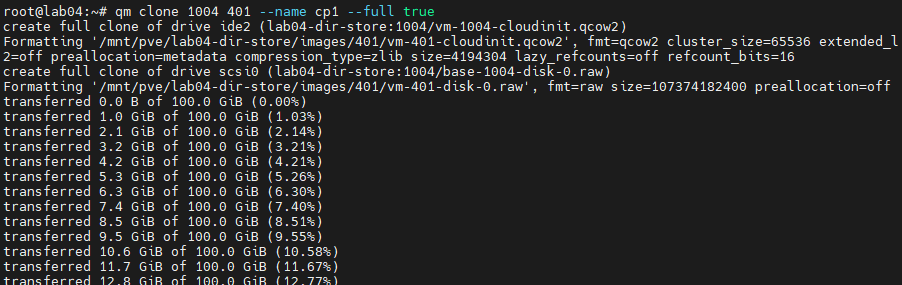
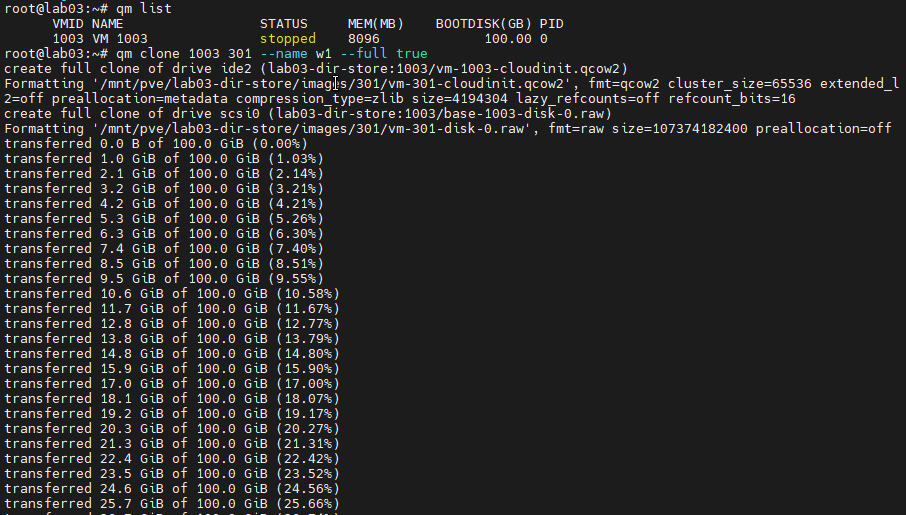
Cloning the VMs:

Attaching the cloud-init snippet to the cloned VMs:


Setting the network configuration for the VM/K3s Node:


Joining the nodes to the cluster:


![]()
Verification
With all of our K3s nodes up and our load balancer VMs up and running, it's time to verify our work.
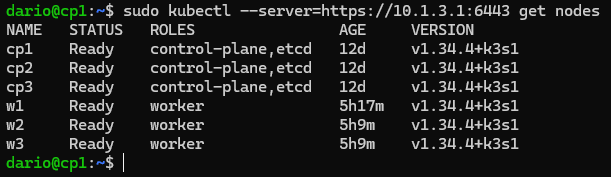
Running sudo kubectl get nodes allows for us to see all the member nodes of our cluster. Below you can see that all the K3s nodes we've configured are reporting as connected and ready for deployments and workloads.

For our load balancer VMs, we will verify the status of the HAProxy and Keepalived services on them. We will also verify that the load balancers are managing themselves according to their established configuration.
In order to accomplish this task, we will check the status of the services via the systemctl commands. We can also check the service logs via journalctl.
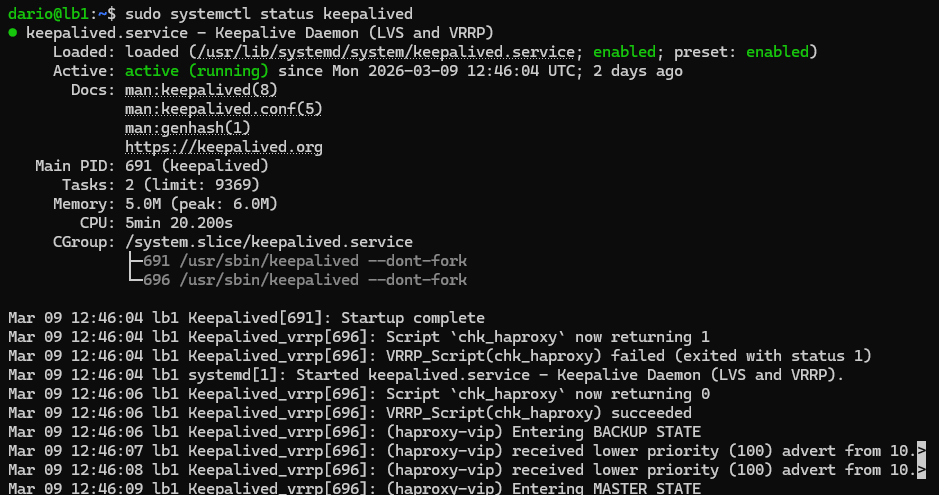
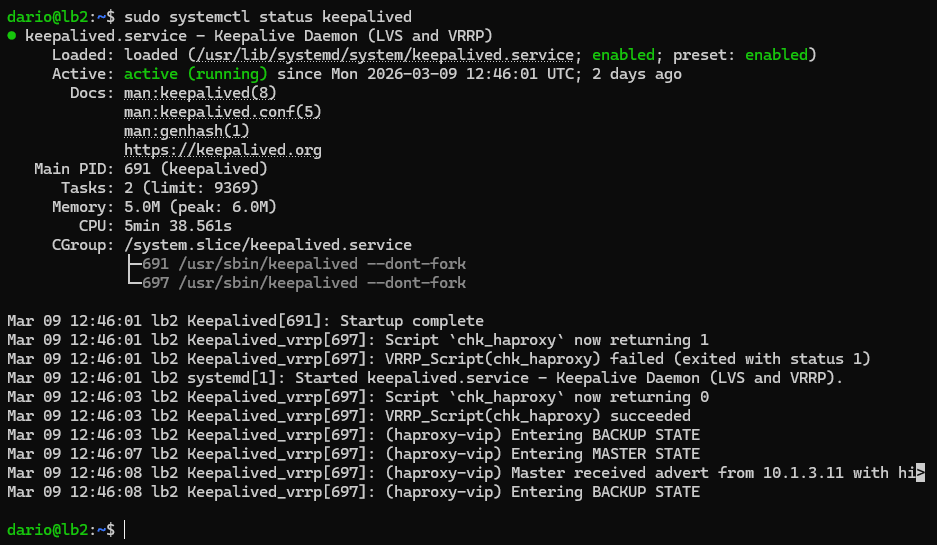
I also checked the IP addresses that are assigned to the load balancer VMs. I want to ensure that the virtual IP address is being maintained by the master and, in the case of a node going down, hands the IP over during failover.
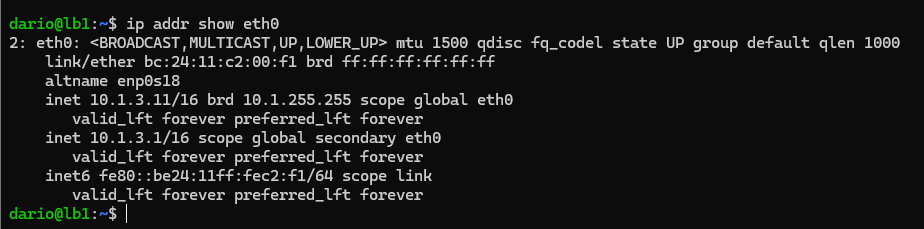
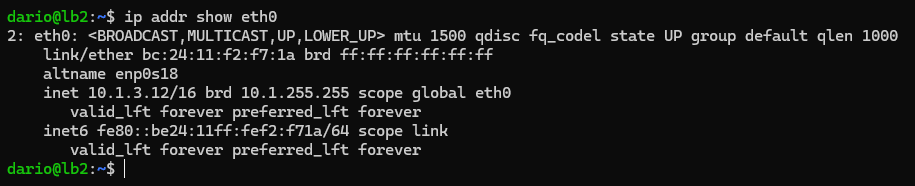
As you can see, our lb1 VM has taken control over the virtual IP address that we have configured. The lb2 VM is in standby mode and will assume control when the lb1 VM goes down.
On the control nodes, we can verify incoming connections and traffic from our load balancer's IP addresses. I have done this via invoking kubectl and targeting our load balancer virtual IP.
Snapshots & Backup
Proxmox has native snapshot functionality. I used this to create baseline backups of all the VMs that are a part of the cluster. These will come in handy if we have any issues in further installments of this project.
This is where I ran into some roadblocks. With the commands that I used for the setup of the VM, the storage type for the VMs were all set to raw. I needed to convert these to the .qcow2 storage type. I accomplished this with the below command:
qm disk move <vmid> <disk_name> <storage_id> --format qcow2
Which, in the case of my w1 worker node, would be....
qm disk move 301 scsi0 lab03-dir-store --format qcow2
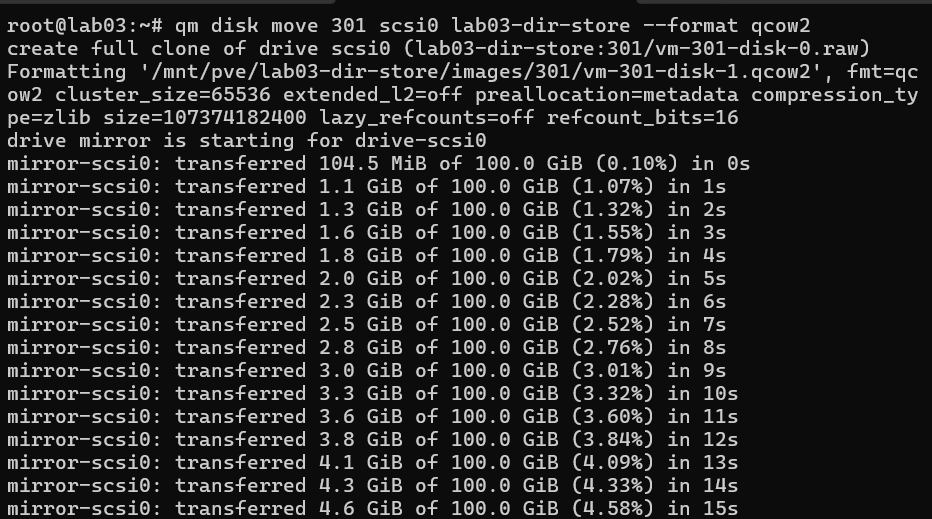
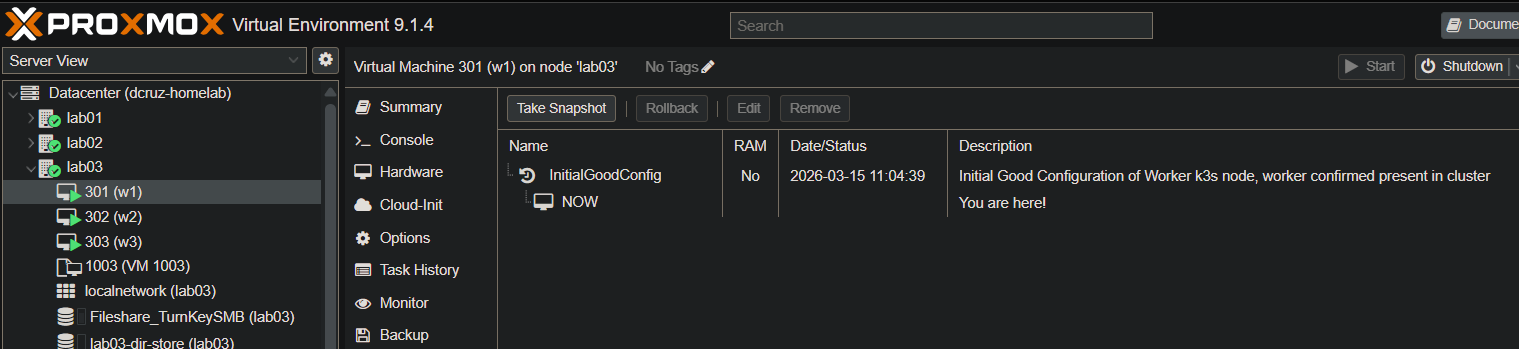
Completing this on all VMs/Nodes in the cluster, I am now able to use qm snapshot to create snapshots of the current known good configuration of all our VMs.
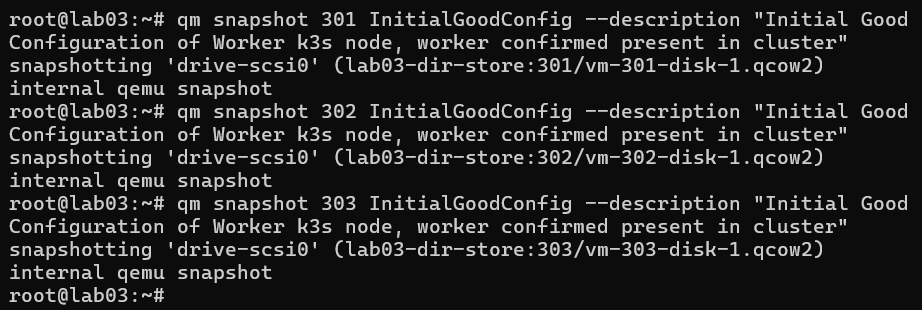
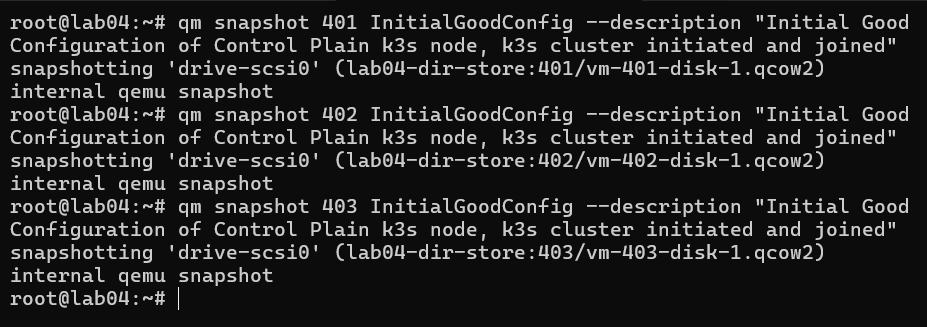
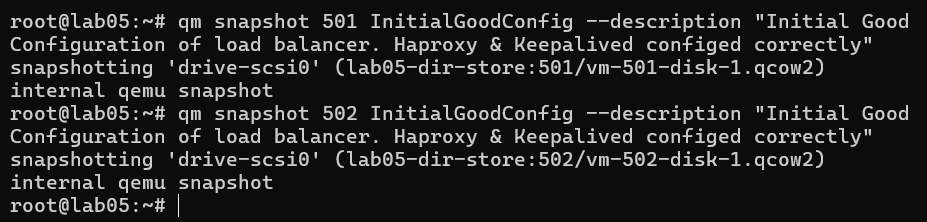
And after running all those commands, we can see the snapshot reflected in the GUI confirming our work.
Lessons Learned
With this being the first part of this K3s project and the initial setup of the K3s cluster, I have learned a lot in terms of how to provision VMs using cloud-init, setting up K3s clusters, setup and configuration of HAProxy and Keepalived for load balancing, and verifying K3s cluster configuration. There were some gotchas that came up while completing and documenting this project, most notably the YAML file format and syntax. Cloud-init YAML files need the correct double-space tabbing and syntax in order for the first run of the VM to be successful.
YAML Linting
Though I did not mention it over the course of this installment of this project, I had a few issues with YAML formatting. This happened specifically when I was creating the cloud-init config files. On the first attempt at using a YAML file I created, I was met with issues of defined configurations not making it to the first boot of the VM, and this was due to the YAML format's requirements for indenting. YAML does not make use of tabs for indentation; instead, you are required to use double-spaces, which makes things much simpler. After I removed all my tab indents and replaced them with double-spaces, all configurations set and all defined commands run on the first boot of the VM.
K3s Verification Commands
After setup of the K3s cluster, I needed some methods for verification. This is where the below commands come in. I was able to make use of the built-in systemctl, journalctl, and kubernetes' kubectl CLI tools.
sudo systemctl status k3s- Shows the K3s service status on the machine for control nodes; does not work on worker nodes.sudo kubectl get nodes- Lists out all of the nodes that are connected to the cluster.ps aux | grep k3s- Checks K3s process and validates the IP that the node is using.sudo journalctl -u k3s -f- Show K3s logs from the current boot of the node (Cluster Nodes only).sudo journalctl -u k3s-agent -f- Same as above but for worker nodes that run the k3s-agent service specifically.
Cloud-init Troubleshooting
Below are some of the commands I found useful when troubleshooting cloud-init and my cloud-config YAML files. These commands aided in me discovering that my YAML files were malformed and the reason why configurations established in the cloud-config YAML file were not reaching the virtual machines that they were applied to.
cloud-init status --long- Shows cloud-init status and logs from the last run.sudo journalctl -u cloud-init -u cloud-init-local -u cloud-config -u cloud-final -b 0- Shows service logs from all cloud-init services that run on first boot.sudo tail -n 200 /var/log/cloud-init.log&sudo tail -n 200 /var/log/cloud-init-output.log- Read out the latest cloud-init logs.
Summary of Achievements
With the initial phase of the DevSecOps Kubernetes Lab complete, we have successfully established a highly available K3s cluster. The following components are verified and operational:
- ✅ High Availability Load Balancer
- 2x Load Balancer VMs (HAProxy + Keepalived) configured for high availability.
- Shared Virtual IP (VIP) operational at
10.1.3.1across both nodes.
- ✅ Control Plane (Master Nodes)
- 3x Nodes joined to the cluster.
- API Server accessible via the Load Balancer VIP.
- ✅ Worker Nodes (Agent Nodes)
- 3x Nodes registered and in
Readystatus. - ✅ Cluster Verification & Persistence
kubectl get nodesconfirms all 6 nodes are healthy and joined.- Proxmox Snapshots: Created "Known Good Configuration" snapshots for all cluster VMs to provide a stable recovery point for future labs.
Next Steps
With the cluster successfully bootstrapped and highly available, the focus for further installments moves to workloads and observability:
- First Application Deployment: Deploy a multi-replica NGINX web server to test the worker nodes and LoadBalancer VIP.
- Implement GitOps (Flux): Transition from manual
kubectlapplies to a declarative GitOps model. - Secrets Management: Integrate SOPS+AGE to manage sensitive cluster configuration securely.
- Resilience Testing: Perform failover testing on the HAProxy/Keepalived Load Balancer to ensure the VIP (
10.1.3.1) transitions correctly.
Potential future project ideas
- GitOps: Flux/Argo CD, manage cluster apps declaratively.
- CI/CD: Build, Scan, Deploy pipelines (GitHub Actions, GitLab CI, Gitea Runner)
- Secrets: Implement external secrets manager (Vault/SOPS+AGE)
- Resilience Testing: Simulate failover, document findings/test results.