Learning Linux with Arch


Hello all,
I know that there has been some time between my previous post and this one. In recent months I have taken on a new role and have been ensuring that I have been taking on my role's responsibilities and tasks. This hasn't left much in the way of time for learning and exploring but, now that everything has settled down, I can dig into some new topics.
Why Linux & Why Arch
Linux is the OS of choice for all tech infrastructure. You would be hard pressed to find any organization that does not use Linux in some way to offer websites and/or services. Linux is king when it comes to the back-end of most of the internet as well.
Arch Linux
Arch Linux has been around since 2002 and has made a reputation for being a barebones, set it up yourself, no bloat version of Linux. Users of Arch are required to actively learn and manage the setup of the OS.
The inspiration for this project and practical learning Linux has come from a youtuber that I have watched in passing named Mischa Van Den Burg. See the video below for yourself.
Installation
Getting started with Arch is fairly simple, we grab the ISO image from the Arch website, either using BitTorrent to download or using one of the provided mirrors for your region. For my purposes I will be installing Arch in a VirtualBox VM.
I will also be following/using the official Arch documentation, which can be found here if you would like to follow along.
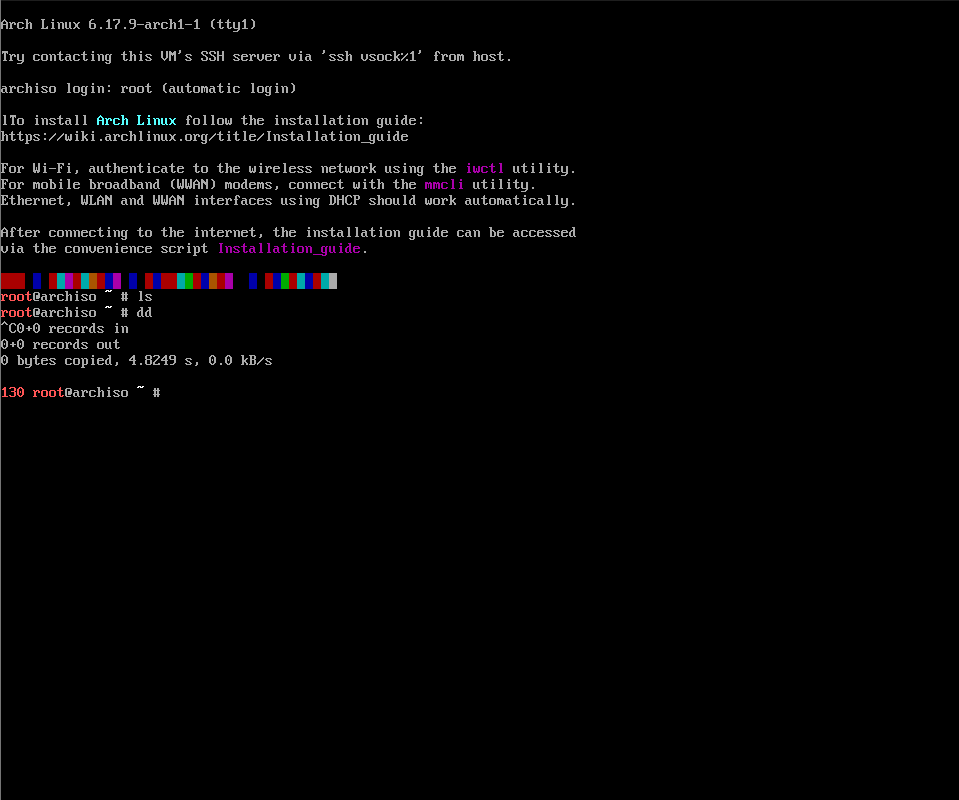
I provisioned the VM with 2 CPU cores, 4gb of RAM, and 70gb of storage space, which should be enough for doing a complete install. I booted the virtual machine to the iso image and we are present with a terminal with root access.
Setting up the Filesystem
Before we actually install Arch, we need to prep the storage device, setting up partitions and the filesystem.
The first steps in doing this are to verify the boot mode which can be UEFI or plain old BIOS.

As you can see I ran the command cat /sys/firmare/efi/fw_platform_size and as you can see from the output of the terminal in the image above, this returned no results. According to the Arch wiki if no file or directory is found from catting this directory, then most likely we are running in BIOS mode.
Next I tested network connectivity, doing an ip link to ensure that my virtual ethernet link was up, ifconfig to check and see if we successfully obtained network configuration via DHCP, and also completed a ping ping.archlinux.org to verify that we can access/traverse the outside internet.
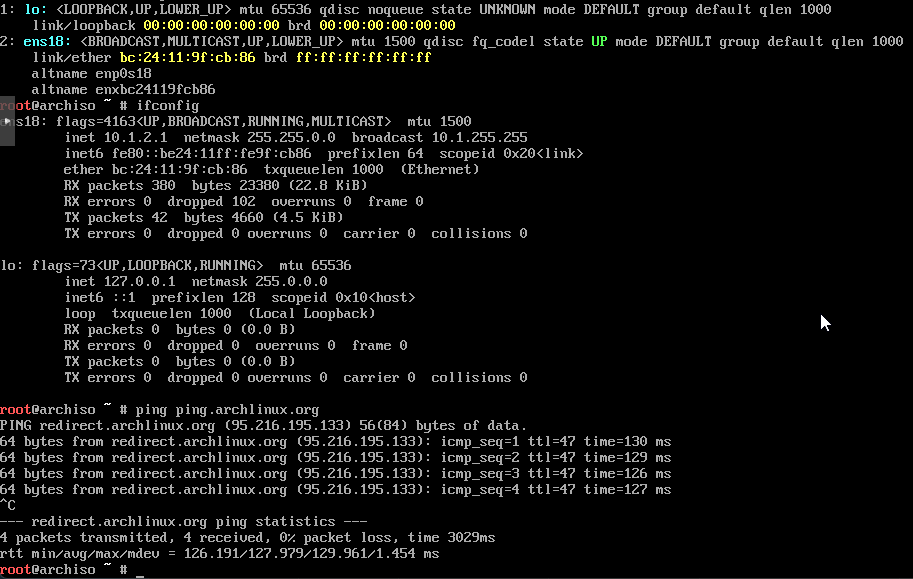
Having our network connectivity confirmed, let's update the time so that we have no networking issues related to time sync to do this I ran the command, timedatectl.

Partitioning
Lets take a look at the disks that we have to work with. In Linux we do this via the fdisk utility, with the complete command being fdisk -l The -l at the end being the flag that designates for the tool to list out all of the drives that are found on the host system.

We can see from the output that our main QEMU disk is present and is reporting the correct size, being 70gb.
Our VM will be using the MBR and the regular BIOS for booting so the partitions on the VM will be simpler than if we were to use UEFI, which needs its own dedicated /boot partition.
For our use case we will be creating the following:
- 1x SWAP Partition, Size 10gb.
- 1x Root Partition, Size 60gb.
In order to actually make these partitions we will again use the tool fdisk. If we look at the image from the previous step, we can see that our VM drive, the QEMU one, has the disk name of /dev/sda. We will use this with fdisk to target and partition the correct drive.
Full command to run == fdisk /dev/sda
When we run the command we are brought to an interactive prompt.

Since no commands we can use are displayed I hit m to show the list of available commands/options.
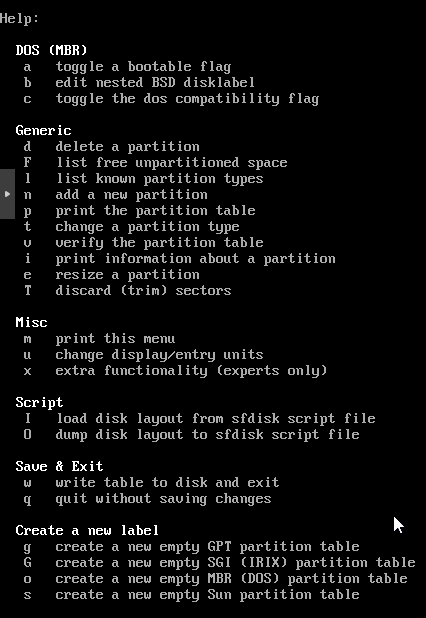
Initially when we ran the fdisk command targeting our VM drive, we received a message stating that no partition table had been created. I went ahead and ran the option for creation of the partition table for our drive, which is o in fdisk.
![]()
And now lets create the root partition. Using the fdisk option n, we can create a new partition
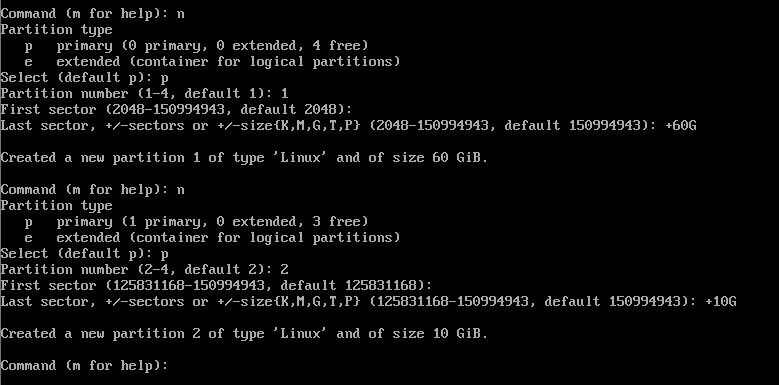
Selecting P for the primary I created the primary partition for Arch to be installed. I gave the primary partition 60gb of storage.
Then I created second primary partition, this one being 10gb in size.
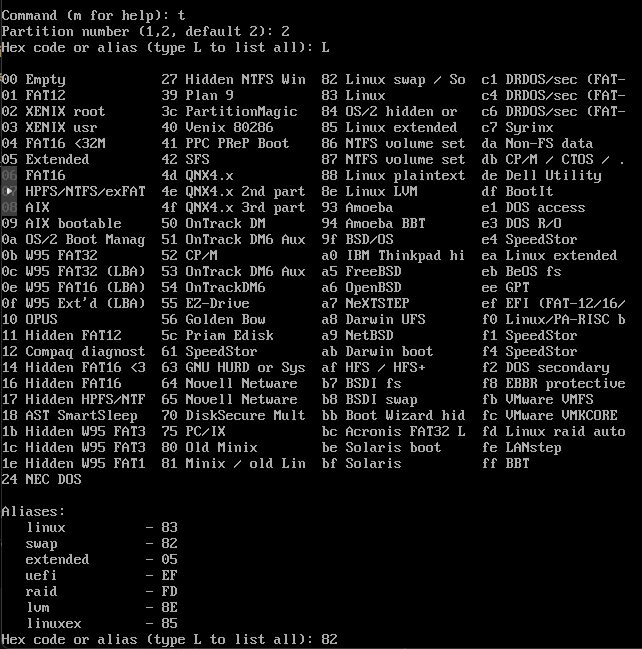
Since I created both partitions as Linux partitions, I went back and converted the second 3gb partition to Linux Swap. Effectively setting up a swap partition for Arch to use.
![]()

And above we have both of our partitions ready to go. Note that we do not need any partition for MBR, if we were making use of GPT or UEFI, we would need to setup a dedicated partition for these boot mechanisms.

The now, before we exit the fdisk utility, we need to apply the changes that we just made. I displayed the help menu again to get the command to "write" the changes to the disk.

Formatting
Now, with our partition table and partitions set, we need to format them in preparation for the OS installation.
/dev/sda1 is our root file system for Arch, thus it will need to be formatted as ext4.
/dev/sda2 is our swap partition and will need to be formatted as swap.
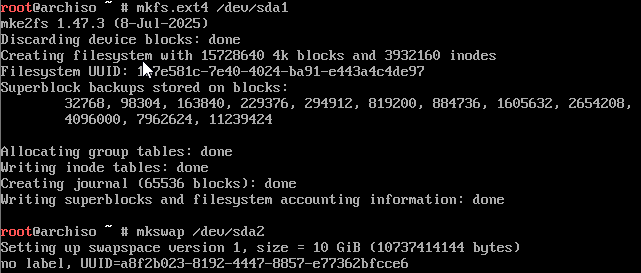
Below are the commands that I ran to format each of the partitions.
mkfs.ext4 /dev/sda1
mkswap /dev/sda2
Mounting
Here we are mounting the now partitioned and formatted file systems. This will make them available to the temporary Arch OS for installation of the permanent Arch OS.
I will also enable our swap filesystem via the command below.

With that, we now have our file system created and ready for the OS install.
Mirrors & Packages
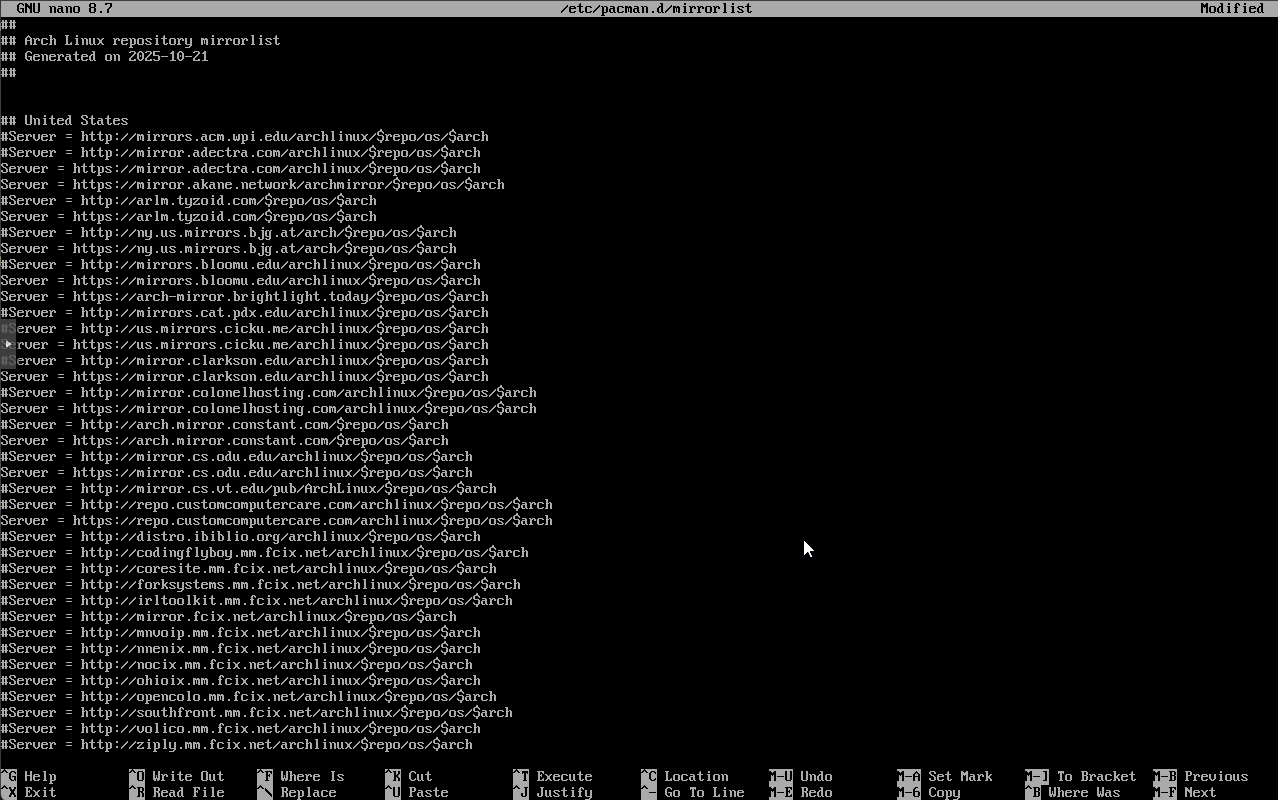
I adjusted the mirrors in /etc/pacman.d/mirrorlists moving all of the United States based mirrors to the top of the list as that is where I am currently located. Since these are geographically closer to me, we should receive good throughput network wise as there is less network traversal taking place.
Microcode
With our mirrors for the package repositories pointing to what is locally available. we can proceed with installation of microcode updates. Microcode is an intermediary layer between the CPU and the instruction set of the computer, more can be learned about it here.
Since we are running this installation of Arch Linux in a VM, which is emulating an x86/x64 based CPU, I will opt for installing the intel-based microcode.
Below is the complete command so far, more packages will be added to the command before executing:
pacstrap -K /mnt base linux linux-firmware intel-ucode
Userspace Utils
According to the Arch wiki we should install some filesystem tools. These will aid in file system creation and management of raid and lvm after install. I have selected a few that I think will be needed and updated the package install command.
pacstrap -K /mnt exfat-utils e2fsprogs hfsprogs ntfs-3g xfsprogs zfs-utils lvm2 mdadm
Network Utils
On our new system we will need networking capabilities(obviously), so I added the networkmanager package to the full pacstrap command along with the addition of mn-connection-editor & network-manager-applet. Both of which provide graphical elements for network configuration/monitoring.
pacstrap -K /mnt networkmanager mn-connection-editor network-manager-applet
Console Text Editors
Linux is primarily based on text, every setting, configuration, as well as other elements, are based in text so it is essential that we have some basic way to edit forms of text from the command line. I have included nano & vim.
pacstrap -K /mnt nano vim
Documentation Packages
Anyone that has had extended time in the Linux command-line will know that man pages are key for troubleshooting and general up keep of your system. They make learning & understanding of CLI tools simple. For this install I will be adding man & info to the list of packages to be bootstrapped before OS installation.
pacstrap -K /mnt man-db man-pages texinfo
Running pacstrap
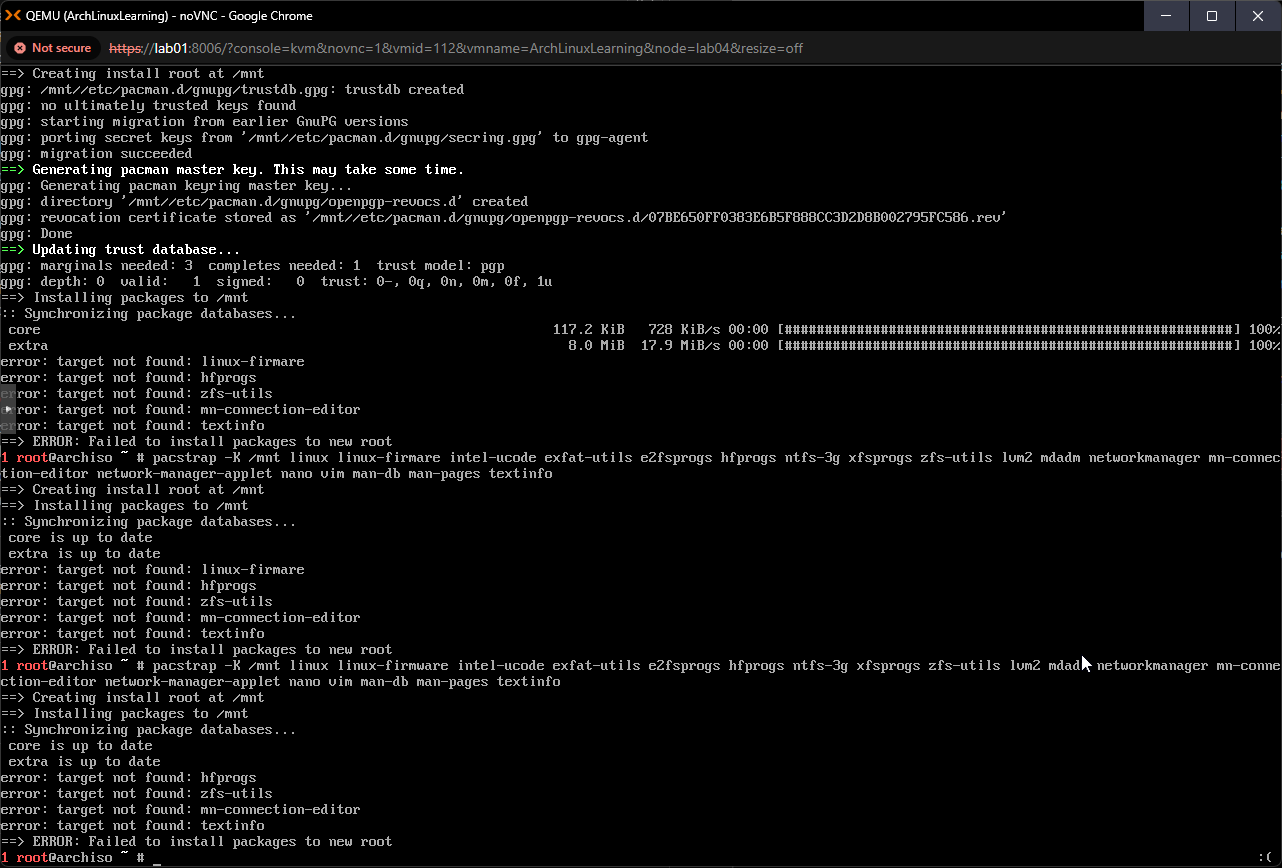
Running the complete command you can observe that most of the packages strapped correctly but, some errored out with "error target not found".
- For the linux-firmware package I had made a typo in the package name.
- hfsprogs is not available on the arch image according to the matrix found on this page.
- zfs-utils is not available on the arch image and can be installed after OS install.
- texinfo failed to install due to typo in the package name, which has been fixed.
And with that, we have all of the needed packages for our Arch Linux installation.
System Configuration
Next we will start to configure the system environment. There are a few items on the list that need to be addressed and the first of which is Fstab
Fstab
Fstab is a service that acts as the file system table, it is used for automatically mounting file systems. We will make use of genfstab to generate an fstab file using the below command.
genfstab -U /mnt >> /mnt/etc/fstab

Changing Root for Further Config
In order to complete the rest of the configuration process for the Arch install, we need to change over to the root account on the permanent file system and make some adjustments. In order to accomplish this we run the command below:
arch-chroot /mnt
![]()
Adjusting Local Time
Below are the commands used to adjust local time. I changed my time zone over to EST.
ln -sF /usr/share/zoneinfo/EST /etc/localtime
hwclock --systohc
We are effectively using the Linux "softlink"/symbolic link function to reference the EST zone info from /etc/localtime. Then with hwclock --systohc we are syncing the hardware clock of our VM to the system/software clock, adjusting the hardware clock to match the software/system clock we just adjusted to EST time.
Localization
Moving on, lets now setup our keyboard layout and localization for dates, currency, etc. In order to do this I will be running the command localectl set-locale LANG=en_US.UTF-8. Then I ran the command locale to list out all of the localization settings that have been applied.
localedef --list-archive
localectl set-locale LANG=en_US.UTF-8

Network Hostname
Time to define the hostname for our Arch install. To accomplish this we need to create a file in /etc/hostname and add our designated hostname there, inside of that file. I had to find a work around to accomplish this as nano is not installed on our Arch system yet. I made use of the redirects to echo the hostname into the file after creation.

Install & Config GRUB
This step is very important. GRUB handles the booting of our Arch install, if we do not install and configure it, we will not be able to boot to the OS after completion of install. To do this I used pacman to install the grub bootloader.
pacman -S grub
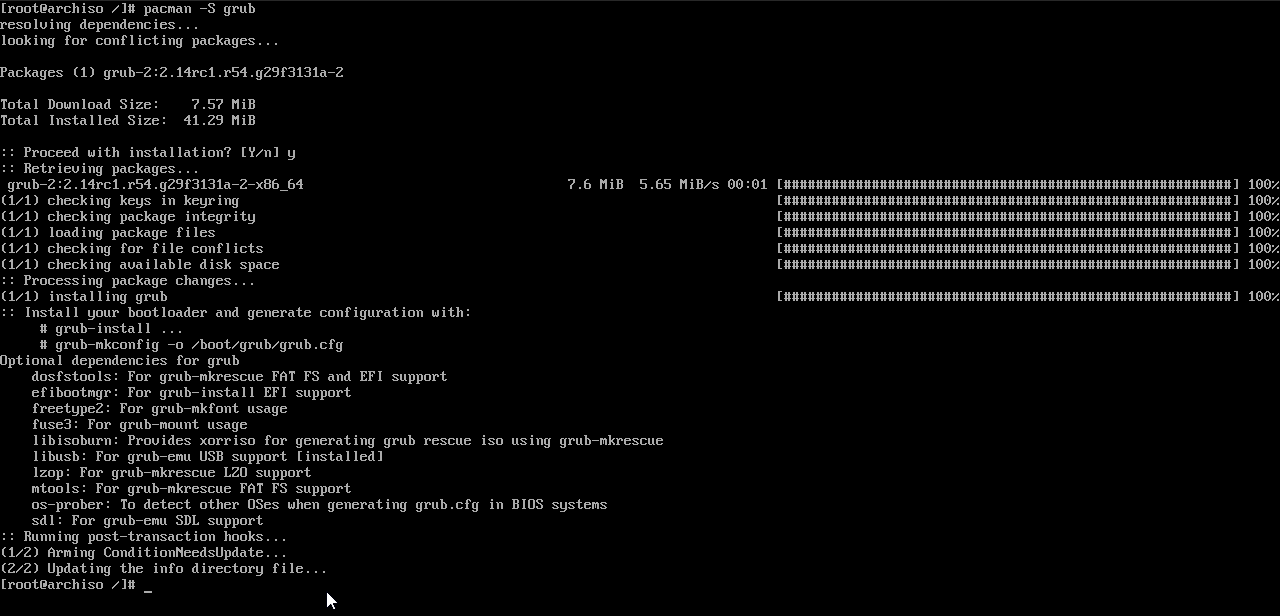
I then proceeded to apply the grub install to our install drive. Note that I said drive and not partition, grub needs to be installed on the entire drive and not just the partition that we will be using as our main for the OS.
grub-install /dev/sda

With grub applied to the drive, we need to generate a configuration file, grub has a built in command for this which is grub-mkconfig. We will point this tool to the file path /boot/grub/grub.cfg using the -o flag, without this flag the config would just be output to the terminal.
grub-mkconfig -o /boot/grub/grub.cfg

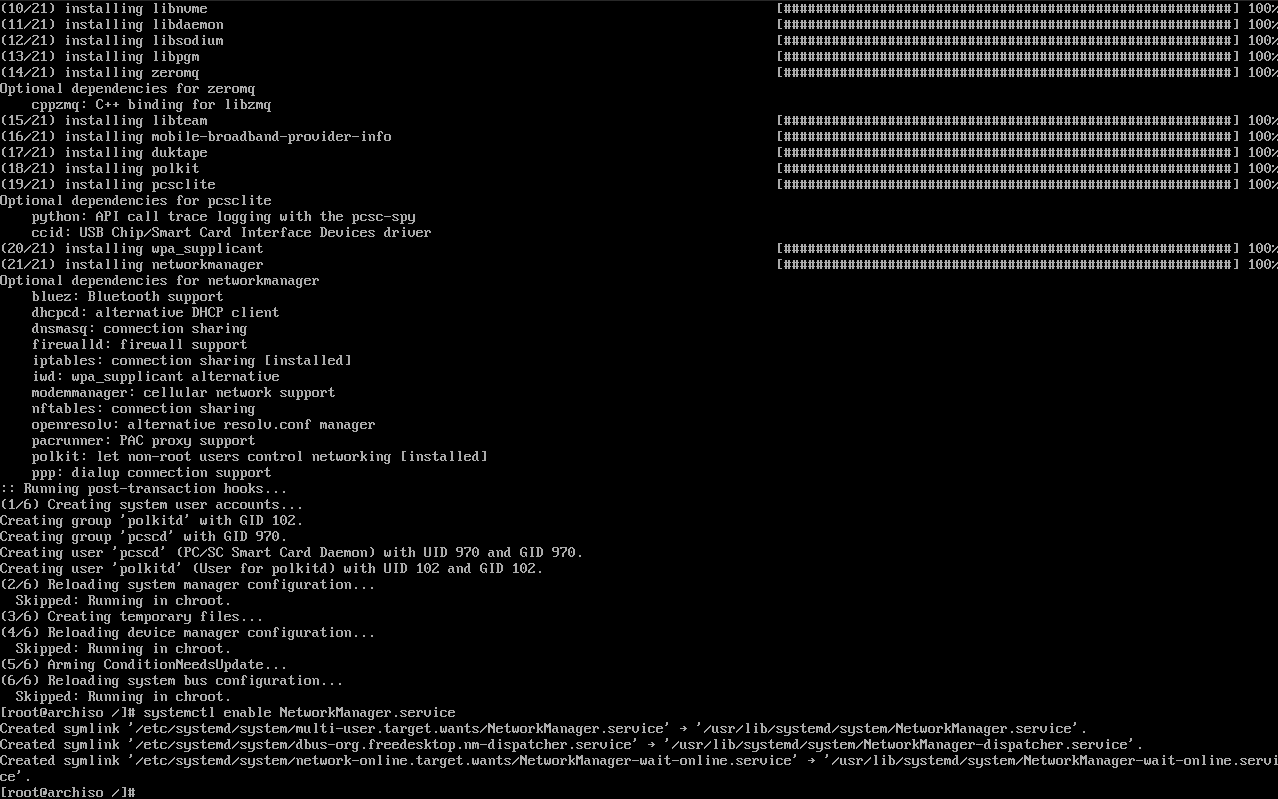
Network Manager
I will be installing the networkmanager tool as well. This is a suite of tools that aid in network connectivity on Linux, Arch included. Using pacman to install and then using systemctl to enable the service on our Arch install.
Setting Root Password
And now for the final part before rebooting and completing our base installation, which will be setting the root password for our Arch OS.

Super simple, just run the passwd tool and then enter & confirm the new password and it is applied to the root account, of which we are currently logged into.
Time to Reboot

And with that we are finished with the base installation of Arch Linux, though we still do not have a GUI/desktop environment installed, we have a basic Linux OS as a base on which to build. In order to confirm our changes and boot into the OS we just setup/configured the only last step is to reboot.
I will be following the Arch wiki's recommendation to unmount all of the partitions.

And finally here we are after reboot, successfully booted into Arch Linux.

From here we can continue to build out the system, adding various tools and functionality as well as a graphical interface. Keep tabs on the blog for the next post in the series.
Missed Network Config (1-14-2026)
Hey everyone. Adding this to the end of the blog post as I had missed a step in setting up networking on our Arch install. After reboot I was not able to get my virtual NIC up and running due to systemd not being installed.
Before reboot we need to pacstrap systemd and then log back into our arch install via arch-chroot /mnt.
Pacstrap systemd:
pacstrap -K /mnt systemd
Once that is bootstrapped into our Arch install, we can log into our installation and run the commands below:
cat <<EOF > /etc/systemd/network/20-wired.network
[Match]
Name=en*

[Network]
DHCP=yes
EOF
*Replace the en* with the name of your ethernet port. If you do not know the ethernet port name then do a ip link to get it's name.
Enable and start systemd:
# Enable systemd-networkd
systemctl enable systemd-networkd.service

# Enable systemd-resolved
systemctl enable systemd-resolved.service
Create sym-link for /etc/resolv.conf:
This step allows for correct DNS resolution to all apps on the Arch install.
ln -sf ../run.systemd.resolve/stub-resolve.conf /etc/resolv.conf
After this step, exit our of arch-chroot and run umount /mnt && reboot.
Once my machine came up and I logged in as root, I did a ip link and my ethernet port was up and connected to my network.
